
Installing Javascript / CSS
The key part of the installation of DataTables is including the DataTables source files on your page. As noted at the top of this page, this simply involves including the DataTables Javascript and CSS files. The CSS file is actually optional, but it provides default styling for your table to make it look good with minimum effort. See the style theme creator if you want to customise the colours of the default DataTables CSS.
The required files can be installed in a number of different ways:
- Using the DataTables CDN
- Locally
- With a package manager such as NPM or Bower.
CDN
A CDN is a Content Delivery Network which has edge servers that are tuned to provide media files with very low latency to web-browsers, and as a user receives a file from the CDN the browser will cache it for reuse. This means that different sites using the same Javascript library can share a large performance improvement since the browser does not need to download the same file from different servers for each site.
The DataTables CDN is powered by CloudFlare which has edge servers all around the world, ensuring that the Javascript and CSS for DataTables can be loaded as quickly as possible by your visitor’s browsers.
To include DataTables on your page simply include the following HTML (remember to include jQuery as well):
Local installation
If you prefer not to use a CDN, and instead have the files hosted on your own server, or if you want to modify the files at all, it is just as simple to get going with DataTables.
Simply use the download builder to download the latest version of DataTables, select any additionally software and styling you want and download the customised package. Then unzip and upload to your web-server. You will then have a directory called available on your server. Then include DataTables on your page using the following HTML:
NPM
DataTables and its extensions are available as NPM packages. The package base name is and the extensions and styling integration options are available as individual packages — see the NPM install guide for full details on the available packages.
For example the following can be used to install DataTables and its default styling:
The DataTables packages all export a factory function that can be executed with two optional arguments — the and jQuery object to use — again see the NPM install guide for details on these parameters. When using Browserify you can simply execute the function without any parameters — e.g.:
Bower
DataTables, its extensions and styling options are also available as Bower packages. The package names are identical to the NPM packages with as the base name. To install DataTables and its default styling via bower use:
Initialising DataTables
That’s almost it! We’ve got the HTML table we want to enhance, and we’ve got all the software and styles we need. All that is now required is to tell DataTables to actually work its magic on the table. This is done with a few lines of Javascript:
If you’ve used jQuery before, you will recognise the form of this script: we wait for the document to be fully ready, and then select the table we want, and run the DataTables function on it.
That’s it! DataTables will add ordering, searching, paging and information to your table by default, giving your end users the ability to find the information they want as quickly as possible.
If you want to customise your DataTable, this can be done by specifying configuration parameters in an object passed to the function. For information on how to use these configuration parameter, please refer to the options manual page.
Non-jQuery initialisation
If you prefer writing Javascript without using the abstractions jQuery provides, you can initialise DataTables (as of v1.11) using:
Where the parameters for are:
- A DOMString selector or HTML elements to pick the table(s) from the DOM.
- An object of DataTables options.
And the constructor will return a DataTables API instance allowing manipulation of the table.
With the basics of how to get DataTables going under your belt, you might now want to explore some of the other options to enhance your tables further:
20 полезных библиотек таблиц данных Javascript — Bashooka
Таблицы данных широко используются в веб-приложениях и мобильных приложениях. Это очень полезно, если вы хотите перечислить данные, которые могут быть представлены в столбцах и строках.Итак, в этом посте мы собрали 20 полезных библиотек таблиц данных Javascript для улучшения ваших таблиц данных.
Раскройте потенциал WordPress Ad
Потрясающая коллекция из 11000+ тем WordPress, включая шаблоны Bootstrap и элементы дизайна
Маленький плагин для простого отображения больших наборов данных
Источник
Это плагин для библиотеки jQuery Javascript.Это очень гибкий инструмент, построенный на основе прогрессивного улучшения, который добавляет все эти расширенные функции в любую таблицу HTML.
Источник
Плагин адаптивной таблицы, созданный на основе jQuery и предназначенный для Bootstrap. Не бойтесь, он работает и без Bootstrap!
Источник
React для эффективного отображения больших списков и табличных данных.
Источник
Это клиентская библиотека для подключения электронных таблиц Google к веб-сайту и визуализации информации с помощью таблиц и диаграмм.
Источник
Это инструмент для изучения и публикации данных. Он помогает людям брать данные любой формы и размера и публиковать их как интерактивный, доступный для изучения веб-сайт и сопутствующий API. Это предназначено для журналистов данных, кураторов музеев, архивистов, местных органов власти и всех, у кого есть данные, которыми они хотят поделиться со всем миром.
Источник
Простая, но мощная библиотека для создания приложений данных на чистом Javascript и HTML.Recline повторно использует лучшие в своем классе библиотеки презентаций, такие как SlickGrid, Leaflet, Flot и D3, для создания «представлений» данных и позволяет вам связать их с вашими данными за секунды.
Источник
Этот модуль представляет собой попытку реализовать таблицы данных Material Design в Angular Material. Таблицы данных используются для представления необработанных наборов данных и обычно появляются в настольных корпоративных приложениях. Таблицы данных особенно полезны для визуализации и управления большими наборами данных.
Источник
Это угловой компонент для представления больших и сложных данных.У него есть все функции, которые вы ожидаете от любой другой таблицы, но в легком пакете без внешних зависимостей. Стол был спроектирован так, чтобы быть чрезвычайно гибким и легким; он не делает никаких предположений о ваших данных или о том, как вы их фильтруете, сортируете или разбиваете на страницы.
Источник
DataTables с использованием директив angular.
Источник
Простая, современная и интерактивная библиотека данных для Интернета.
Источник
Это файл Vue.js-компонент, который будет автоматически запрашивать данные (JSON) с сервера и красиво отображать их в html-таблице с подкомпонентом сменной / расширяемой разбивки на страницы. Вы также можете добавить кнопки в каждую строку и привязать к ней событие


Источник
Он разработан таким образом, чтобы его было легко реализовать и максимально настраивать. Он включает в себя исчерпывающий API, полезные руководства, а также поддержку сообщества и коммерческую поддержку.
Источник
Плагин JQuery для создания таблиц CRUD на основе AJAX.
Источник
Он позволяет создавать интерактивные таблицы за секунды из любой таблицы HTML, массива JavaScript, источника данных AJAX или данных в формате JSON.
Источник
Это таблица возможностей, созданная для пользователей, которым нужен полноценный, полностью настраиваемый компонент таблицы для своих приложений. Он сконструирован таким образом, чтобы быть гибким, масштабируемым и эргономичным для повседневного использования.
Источник
Он передает данные для таблиц в фоновом режиме, обновляет и отображает их с помощью шаблонных фреймворков, таких как Mustache.js, HandleBars.js
Источник
Это расширенный компонент сетки / электронной таблицы JavaScript.
Источник
Легкий, расширяемый плагин HTML-таблицы без зависимостей. Подобно jQuery DataTables, но без зависимостей.
Источник
Это самая быстрая таблица данных с открытым исходным кодом для Интернета.
Источник
DataTables Manual
Installation
How to get DataTables up and running on your web-site. This section details the requirements DataTables has of your HTML tables, what files you need to include to have DataTables enhance your tables, how to include them and how to run DataTables. You’ll be up and running in less than two minutes! Read more »
Data
Data is complex, and all data is different. Accordingly, DataTables has a wealth of options which can be used to configure how it will obtain the data to display in the table, and how it processes that data. This section of the manual describes the options to configure DataTables to read data from your data source. Read more »
Ajax
This section of the manual looks in detail at how to load Ajax sourced data into your DataTables with a JSON data source. This is comprised primarily of two tasks — where the array for the rows of data is in the JSON and the data point to be used for each column. Read more »
Options
DataTables’ huge range of options can be used to customise the way that it will present its interface, and the features available, to the end user. This section of the manual details how this configuration can be performed. A full list of the options available is shown in the options reference section of this web-site. Read more »
API
The DataTables API presents a wealth of options for accessing the data contained in a table, and otherwise manipulating the table programmatically. These functions range from selecting rows, columns and cells to get and set their data, to changing column visibility and applying search terms to the table dynamically. Read more »
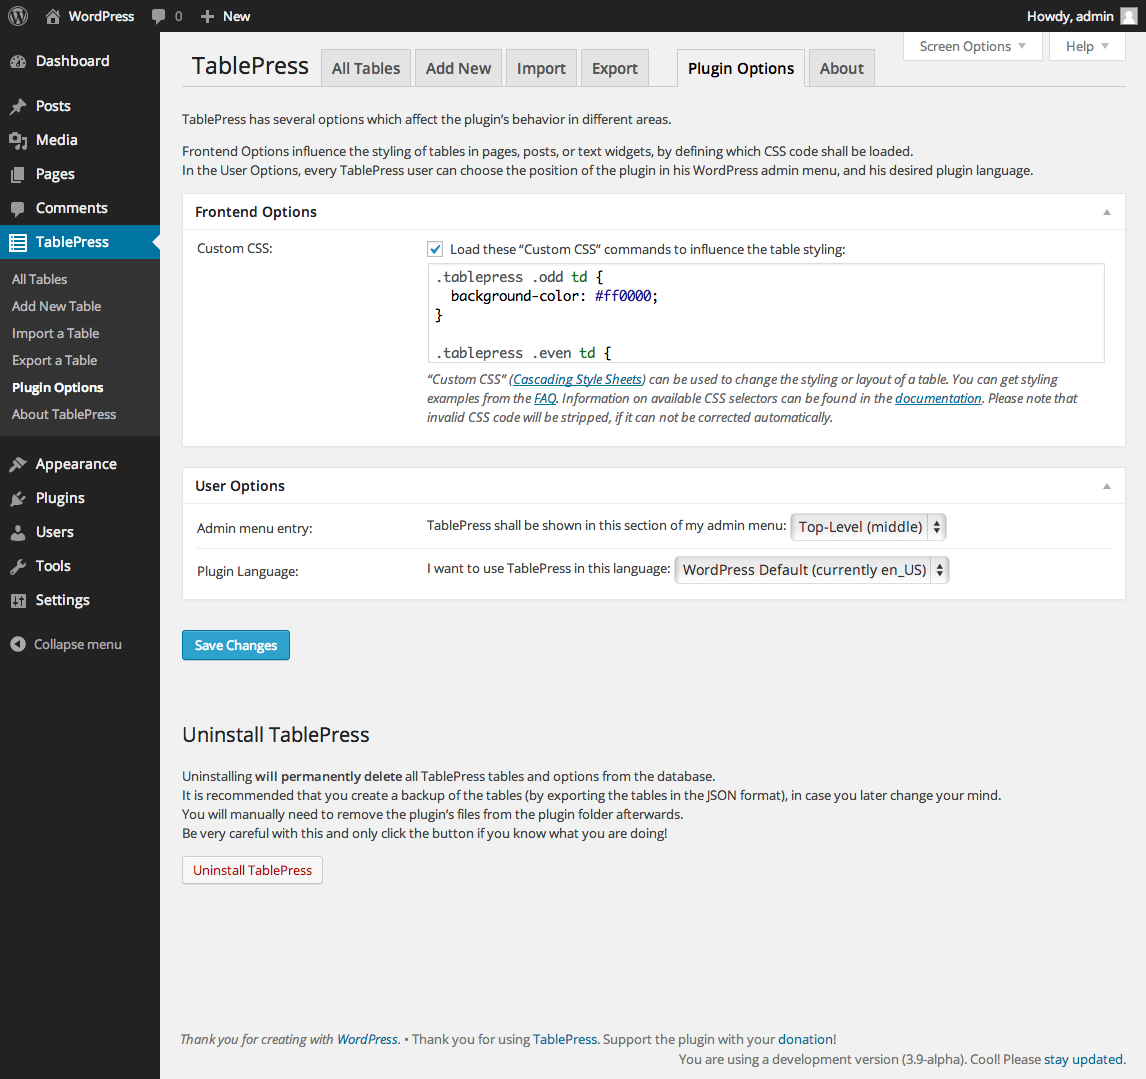
Styling
It is important to style the DataTables enhanced tables in a manner which suits your design, so the tables fit in seamlessly with the rest of your site / app. To this end, DataTables provides a number of options for styling the tables, including its own customisable CSS, integration with CSS frameworks such Bootstrap and Foundation and pre-built themes. Read more »
Events
Knowing when DataTables has performed an operation can often play an important role in a complex and dynamic web-application. For this reason, DataTables will fire custom DOM events, which can be listened for using jQuery’s on() method, and the namespace. Read more »
Server-side processing
Server-side processing allows DataTables to leverage the abilities and sheer power of database engines directly, to allow them to do the heavy work of ordering, searching and paging data. This is done by making an Ajax call for each page to be displayed by DataTables and is suited for very large datasets. Read more »
Internationalisation
DataTables adds several controls to a document when it enhances a table, many of which utilise language strings in one way or another to convey the usage to the end user. These default strings are in English, but can easily be translated into another language, or the strings customised. There are over 50 translations provided by the community ready to be used. Read more »
Security
Security is a fundamental topic in web-development and is a topic that should not be overlooked by any developer, from interns to CTOs. High profile hacking cases are frequently in headlines around the world, but with some careful thinking and planning you can quickly create secure applications. This page discusses web security attacks that are directly relevant to DataTables, along with methods for how you can combat them. Read more »
Plug-in development
As flexible as DataTables is, there may be times when you wish to customise certain aspects to your specific needs. DataTables has a number of plug-in and extension options which are detailed in this section. Read more »
Technical notes
Technical notes contain information about DataTables that doesn’t quite fit into the flow of the rest of the documentation, explaining error messages, technical decisions regarding the implementation of DataTables and detailed explanations of other general topics of interest when working with DataTables. Read more »
Development
As open source software, DataTables is free for you to investigate its source, and I would very much encourage you to do so and contribute any changes you make back to the project so others can also benefit. This section of the manual describes how you can build DataTables from source, contribute code and the planned road map for DataTables. Read more »
Syntax of DATATABLE
The syntax of DATATABLE function is the following:
DATATABLE (
    <column1_name>, <column1_datatype>,

    {
        { <value1_row1>   }
          }]
    }
)
The column_name is always a constant string and cannot be the result of an expression.
The column_datatype defines the data type of the column and can be one of the following names, followed by the corresponding data type in the Power BI Desktop user interface:
- BOOLEAN (True/False)
- CURRENCY (Fixed Decimal Number)
- DATETIME (Date/Time)
- DOUBLE (Decimal Number)
- INTEGER (Whole Number)
- STRING (Text)
After you defined all the columns, you provide a list of rows, embedded between curly brackets (braces). For each row, you provide a list of constant values embedded between another pair of braces. Only constant values are accepted in a list embedded within braces, you cannot use expressions in these values. For example, the following syntax is not valid because of the use of an expression in the third value of the first row:
    {
        { "Low", 0, 5 + 5 },
        { "Medium", 10, 100 },
        { "High", 100, 9999999 }
    }
If you create a column of DATETIME data type, you have to pass a string in the format “YYYY-MM-DD HH:MM:SS”. You can omit the date, the time or just the seconds, if you want. If you omit the date, it will be December 30, 1899 (which is the zero date in DAX). If you omit the time, it is midnight (which is the zero time in DAX).
For example, the following expression returns a table with start and end date of quarters in year 2015.
Quarters2015 =
DATATABLE (
    "Quarter", STRING,
    "StartDate", DATETIME,
    "EndDate", DATETIME,
    {
        { "Q1", "2015-01-01", "2015-03-31" },
        { "Q2", "2015-04-01", "2015-06-30" },
        { "Q3", "2015-07-01", "2015-09-30" },
        { "Q4", "2015-010-01", "2015-12-31" }
    }
)
Initialising DataTables
That’s almost it! We’ve got the HTML table we want to enhance, and we’ve got all the software and styles we need. All that is now required is to tell DataTables to actually work its magic on the table. This is done with a few lines of Javascript:
If you’ve used jQuery before, you will recognise the form of this script: we wait for the document to be fully ready, and then select the table we want, and run the DataTables function on it.
That’s it! DataTables will add ordering, searching, paging and information to your table by default, giving your end users the ability to find the information they want as quickly as possible.
If you want to customise your DataTable, this can be done by specifying configuration parameters in an object passed to the function. For information on how to use these configuration parameter, please refer to the options manual page.
Non-jQuery initialisation
If you prefer writing Javascript without using the abstractions jQuery provides, you can initialise DataTables (as of v1.11) using:
Where the parameters for are:
- A DOMString selector or HTML elements to pick the table(s) from the DOM.
- An object of DataTables options.
And the constructor will return a DataTables API instance allowing manipulation of the table.
Код CSS
На данном этапе мы определяем некоторые основные стили следующим образом:
Необходимо, чтобы вы понимали, что:
В нашей разметке идентификатор отсутствует. Он добавляется плагином DataTables, как только мы его инициализируем
Несмотря на то, что мы определяем несколько правил для маленьких экранов, обратите внимание, что демоверсия не будет соответствовать всем требованиям отзывчивого веб-дизайна. Есть множество дополнений, которые мы можем внести для улучшения вида таблицы и диаграммы на устройствах с маленьким экраном
Например, для DataTables имеется расширение Responsive. Но это выходит за рамки обсуждаемой в этом руководстве темы.
![Jquery-datatables — datatables - детализация строк с помощью вложенной независимой таблицы [закрыто]](https://luxe-host.ru/wp-content/uploads/5/a/1/5a1fe6f62ca4b722dfb97f571be30ad6.png)

После создания CSS давайте посмотрим, как выглядит проект. Пока что мы не заметим большой разницы, поскольку мы не инициализировали библиотеку:
2.5 Custom Column Names
By default, shows the column names of the data in the table, and you can use a custom character vector for the table header. There are a few possibilities. The first one is, you provide a new character vector to completely replace the column names of the data, e.g.
This can be cumbersome if you only want to replace one or two names, and you do not want to provide a whole vector of names. Then here is the second possibility: you can provide a shorter numeric or character vector as the index vector to replace a subset of the column names. For example, if you only want the 2nd name to be , you can use ; or if you want to replace the name with , you can use .
When you display row names of the data, its column name will be a white space by default. That is why you cannot see its column name. You can certainly choose to use a column name for rownames as well, e.g.
Дополнение: Настройка Pusher
Зарегистрируйте бесплатную учетную запись Pusher :
Создайте новое приложение, выбрав в боковой панели пункт « Apps» и нажав кнопку « Create New», расположенную в нижней части боковой панели:
Настройте приложение, предоставив основную информацию, запрошенную в представленной форме. Также можно выбрать среду, с которой вы собираетесь интегрировать Pusher :
Вы можете получить свои ключи на вкладке App Keys :
Данная публикация представляет собой перевод статьи « How to build a realtime table with DataTables » , подготовленной дружной командой проекта Интернет-технологии.ру
Пожалуйста, посмотрите мою проблему ниже:
Я использую в своей MVC-Web-Application jquery datatables. Когда я показываю только 8 столбцов, все работает нормально. Но с еще одним столбцом я получаю сообщение ajax-error, см. Заголовок.
Контроллер wokr отлично, потому что 8 столбцов работают нормально. Здесь мой код представления:
Вы можете, что последние столбцы не активны, а затем:
Когда я делит//из последнего столбца, тогда:
Как я могу решить эту проблему? Пожалуйста, помогите мне. Я ищу решение, с понедельника, весь день!
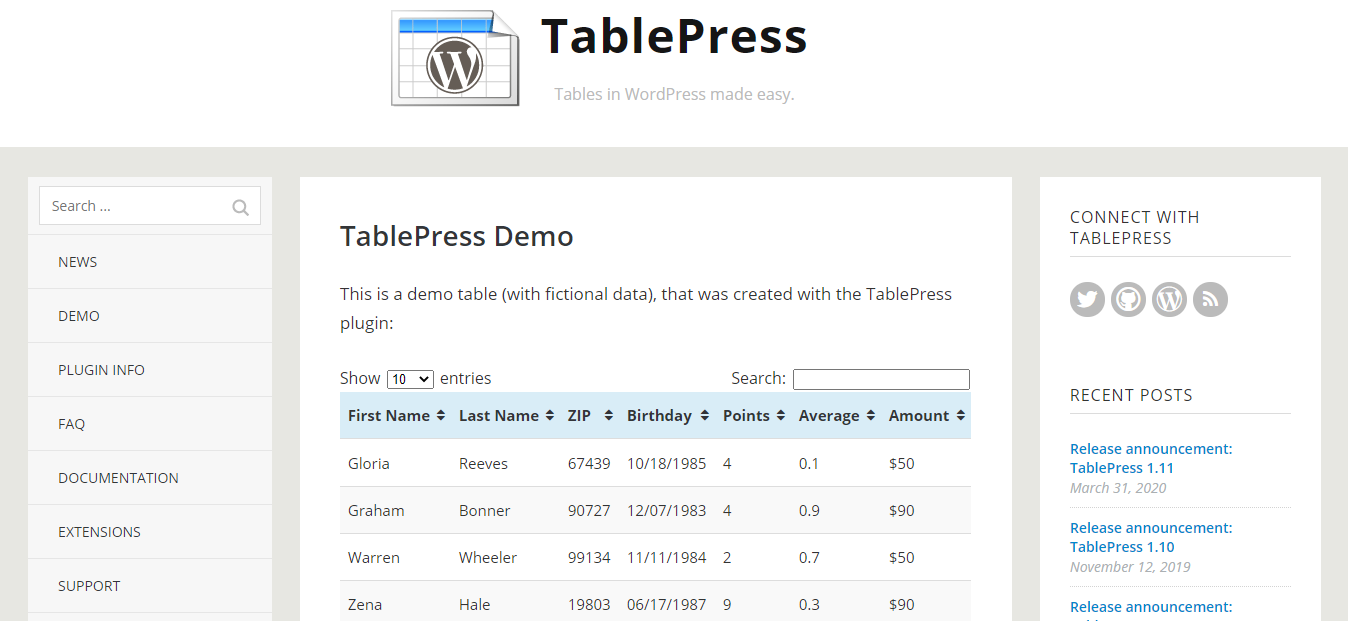
Принцип и возможности
Цель DataTables — улучшить доступ к данным в таблицах HTML.
Действительно, основными недостатками таблицы без форматирования являются:
- отображение сырых данных: визуально таблица оставляет желать лучшего.
- невозможно взаимодействие с данными, что делает сбор информации относительно неэффективным.
- место таблицы на странице: сетка занимает столько места, сколько необходимо для отображения всех строк и всех столбцов. Когда количество данных становится важным, просмотр таблицы утомляет и представляет собой пустую трату времени для пользователя.
Таким образом, эргономика базовой HTML-таблицы оставляет желать лучшего.
Чтобы исправить это, был разработан плагин. Его возможности будут полезны следующим 2 типам людей:
- Сам разработчик . Действительно, он предоставляет широкий спектр возможностей для форматирования данных, их получения, отображения и способов взаимодействия с ними.
- Конечный пользователь . В соответствии с базовой конфигурацией DataTables или настройкой, персонализированной разработчиком, посетитель сайта сможет интуитивно, быстро и, следовательно, эффективно просматривать информацию, содержащуюся в таблице.
Таким образом, библиотека jQuery DataTables в основном предлагает следующие возможности:
- Пагинация (настраиваемая) табличных данных.
- Сортировка данных по одному или нескольким столбцам.
- Мгновенный поиск: общая или фильтрация по столбцам.
- Многоязычный.
- Настраиваемая тема доски с помощью Boostrap , Foundation , Semantic UI и многих других.
- Большое количество расширений (TableTools, FixedHeader, KeyTable…).
- Возможность копировать, распечатывать или экспортировать таблицу в формате PDF, CSV или Excel.
- «Мобильный» интерфейс (таблицы адаптируются к размеру подставки).
- Редактируемая таблица даже после загрузки страницы (добавление строки,
Этот список не является исчерпывающим. Благодаря конфигурации разработчика можно настроить большое количество элементов.
Server side processing
In the above examples we have worked with a plain HTML table and a json array directly given in the client side. Sometimes the database will have too many records and it may not be wise to fetch them all at once and apply DataTables to it. Instead we can use the server-side processing feature provided by the library and fetch the only records that are currently displayed in the front-end.
Each time the table is rendered, DataTables will send a request with number of parameters to the server, including the starting point, display length, search data, sorting column etc. The server can use them in an SQL query to filter the data and send them back to the client. DataTables expect a few attributes in the returned json data to display them correctly in the front-end. They are:
– Number of total records in the table, before applying the filters. – Number of records returned after applying the filters. – An un-altered copy of the sEcho sent from the client. – Array of data from the server.
And the json response from server may look something like:
In order to render this, we’ll first create an html table with the corresponding column headings.
Here we’ve just told DataTables to load the data from server by setting to . Once it’s enabled, we should also provide a data source, using property. In the json data returned from the server, by default DataTables will look for the to get the data to be displayed in the table. You can override this by specifying the attribute name in property.
In this case we are getting an array of json objects, so we should map which key should be displayed in which column. We have used instead of . Both do the same thing, but in a different way. When using the length of array should be equal to number of columns in HTML table so that we should provide a mapping for each column.
There is more…
Apart from the above-mentioned features, DataTables provides lots of really useful functionalities and we can extend them by using or writing our own plugins. It also provides a simple API to manipulate the table once it’s created.
This code will log value data in a row when we click on it. basically accepts a TR/TD node or the index of row and return the value in that row or cell.
Sometimes it will be useful to save the current state of a table when we switch from one page to another page. You can enable state saving by setting “” :, during initialization. By default the state will be saved in a cookie. DataTables allows us to define callback function to override this, so that we can store it in or in the server itself. Here is an example that’ll save the state in
Here will be called to save the state as soon as the table is rendered. Next time before rendering the table, it will call and load the previously stored state. Note: in version 1.10, DataTables will be using as the default store to save the state.
Установка Pusher на сервере
Запустите приведенную ниже команду для установки зависимостей сервера:
npm install express body-parser cors
В результате будет создан файл server.js. Затем инициализируем Express, после чего настраиваем его для поддержки совместного использования ресурсов, закодированного тела и JSON.
После этого создаем новый экземпляр Pusher, который содержит объект с идентификатором приложения, ключом, секретом, кластером и настройками шифрования.
Затем создаем маршрут POST, и в нем используем Pusher для запуска события с именем new-record через канал record:
const express = require('express'); const bodyParser = require('body-parser') const Pusher = require('pusher') const cors = require('cors') const app = express(); app.use(cors()) app.use(bodyParser.urlencoded({ extended: false })) app.use(bodyParser.json()) const pusher = new Pusher({ appId: 'APP-ID', key: 'KEY', secret: 'SECRET', cluster: 'CLUSTER', encrypted: true }); app.post('/record', (req, res) => { console.log(req.body); pusher.trigger('records', 'new-record', req.body); res.send('Pushed'); }) app.listen(2000, () => console.log('Listening at 2000'));
Чтобы выполнять обновление в таблице в режиме реального времени, в файле script.js (на стороне клиента) используем метод Pusher subscribe() для подписки на записи records. Затем определяем функцию обратного вызова, которая привязывает событие new-record, а вместе с ним и данные:
var pusher = new Pusher('APP-KEY', {
cluster: 'CLUSTER',
encrypted: true
});
var channel = pusher.subscribe('records');
channel.bind('new-record', (data) => {
this.addRow(dataTable, data);
});
![]()
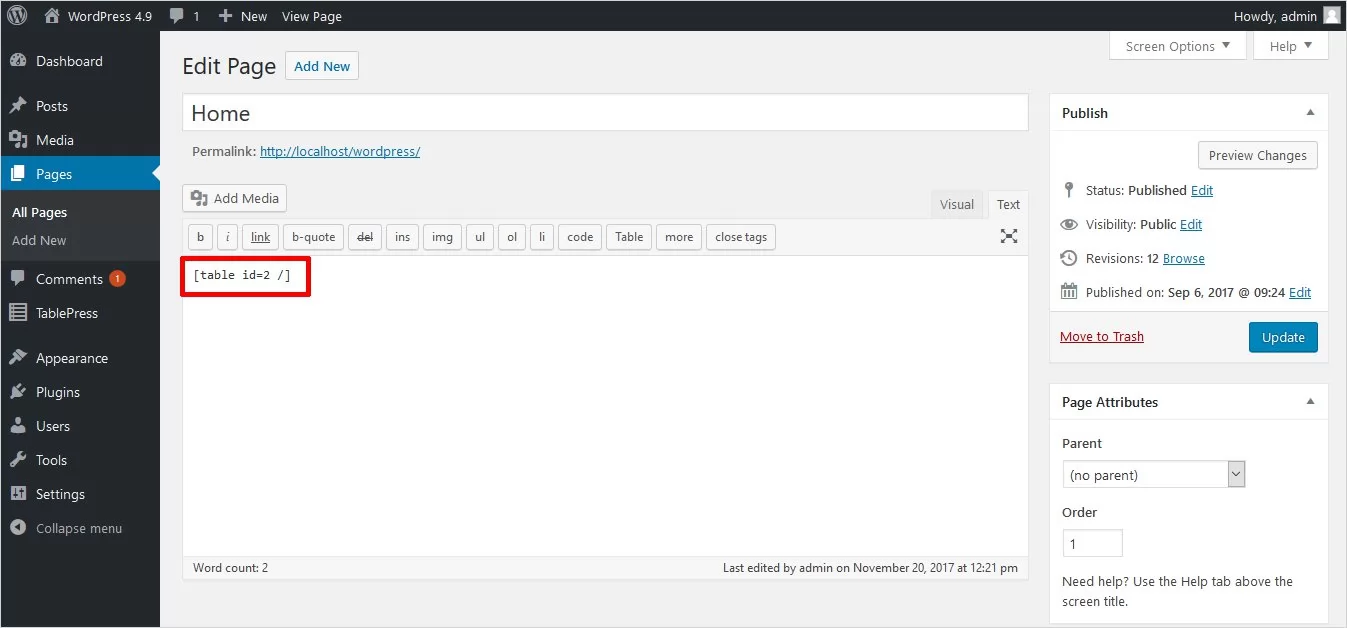
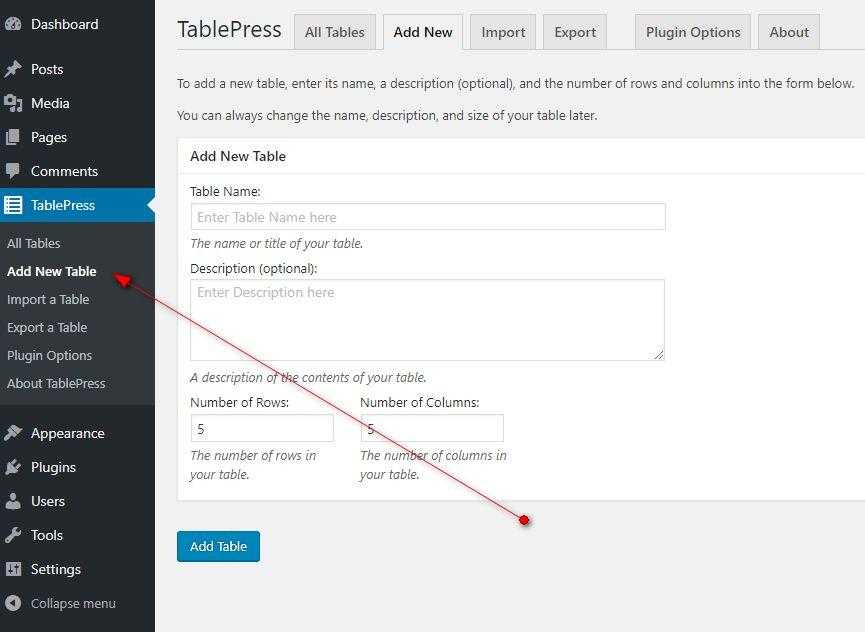
Как создать таблицу используя HTML
HTML-таблицы создаются в четыре шага.
1. На первом шаге в html-коде с помощью парного тега <table> указываем браузеру, что в web-страницу вставлена таблица: <table></table>. Элемент table является блочным элементом web-страницы. Следовательно таблица всегда выводится с новой строки с отступами по вертикали от соседних элементов, поэтому нет необходимости помещать ее в абзац.

2. На втором шаге формируем строки таблицы, помещая парные теги <tr> внутрь <table>. Каждый элемент <tr> создает отдельную строку:
<table>
<tr></tr>
<tr></tr>
<tr></tr>
</table>
3. Далее, на третьем шаге формируем ячейки таблицы с помощью парных тегов <td> и <th>, которые помещаются внутрь элемента <tr>. Тег <td> создает обычную ячейку, а <th> ячейку заголовка, т.е. шапку соответствующего столбца:
<table>
<tr>
<th></th><th></th><th></th>
</tr>
<tr>
<td></td><td></td><td></td>
</tr>
<tr>
<td></td><td></td><td></td>
</tr>
</table>
4. Ну и на последнем шаге помещаем внутрь элементов <th> и <tr> содержимое ячеек. HTML-код вставки таблицы на веб-страницу выглядит примерно так:
<table border=»1″>
<tr>
<th>Столбец 1</th><th>Столбец 2</th><th>Столбец 3</th>
</tr>
<tr>
<td>Ячейка 1-1</td><td>Ячейка 1-2</td><td>Ячейка 1-3</td>
</tr>
<tr>
<td>Ячейка 2-1</td><td>Ячейка 2-2</td><td>Ячейка 2-3</td>
</tr>
</table>
В открывающий тег table я добавил атрибут border и присвоил ему значение 1 для того, чтобы на странице в браузере были видны границы ячеек. По умолчанию этот атрибут равен 0. Результат:
| Столбец 1 | Столбец 2 | Столбец 3 |
|---|---|---|
| Ячейка 1-1 | Ячейка 1-2 | Ячейка 1-3 |
| Ячейка 2-1 | Ячейка 2-2 | Ячейка 2-3 |
Более тонко настроить отображение границ помогут каскадные таблицы стилей. С помощью можно изменить толщину и цвет рамок, а также изменить тип границ.
Текст, который необходимо поместить внутрь ячеек, заключать в блочные теги необязательно, но, если текст большой, его можно разбить на абзацы, применив тег <p>. Если понадобиться как-то оформить вставляемый текст, то можно использовать теги оформления.
Кроме текста мы можем помещать в ячейки картинки с помощью тега <img>:
<td><img src=»image.jpg» alt=»картинка в ячейке»></td>
В качестве содержимого ячейки может даже выступать другая таблица. В этом случае создание вложенной таблицы ничем не отличается от создания обычной таблицы. Просто между тегами <td> и </td> вставляются теги <table> и </table>, и в нее вставляются строки и ячейки.
При создании таблиц необходимо учитывать некоторые правила:
- для создания таблицы используется только тег <table>;
- тег <tr> может находиться только внутри тега <table>;
- теги <td> и <th> могут находиться только внутри тега <tr>, любое другое содержимое тега <tr> игнорируется браузером;
- содержимое таблицы(текст или картинки) может находиться только в тегах <td> и <th>;
- ячейки таблицы должны иметь хоть какое-то содержимое, иначе браузер может их вообще не отобразить, если же какая-то ячейка должна быть пустой, то в нее обычно помещают неразрывный пробел (HTML-литерал );
- таблица относится к блочным элементам web-страницы;
- размеры таблицы и ее ячеек зависят от содержимого, т.е. таблица растягивается по ширине и высоте так, чтобы все уместилось;
- между границами отдельных ячеек и между границей каждой ячейки и ее содержимым делается небольшой отступ;
- текст ячеек заголовка(элемент th) выводится полужирным шрифтом и выравнивается по центру;
- границы вокруг таблицы и ее ячеек по умолчанию не рисуются.
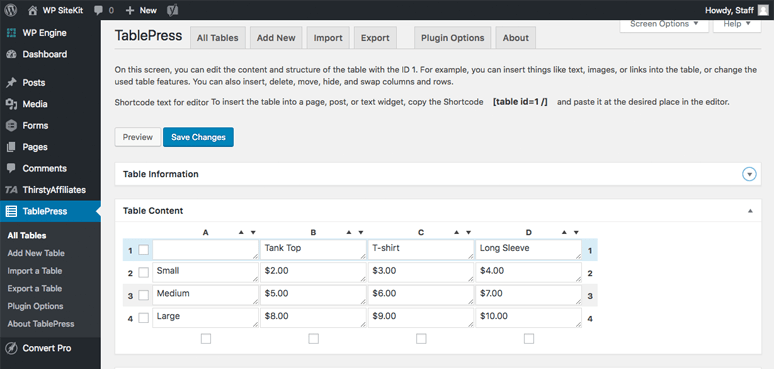
Код HTML
Для начала мы определяем элемент класса , который содержит два подэлемента:
- Таблицу с 26 строками. Первая строка относится к заголовкам таблицы , а остальные 25 строк содержат подробности о странах. Источником данных нашего примера является worldometers.info.
- Пустой элемент , в котором будет располагаться диаграмма.
Ниже располагается структура кода HTML:
Стоит отметить, что ради наглядности мы прописали данные прямо в вышеупомянутой таблице. Тем не менее, в реальных проектах таблицы должны создаваться динамически.
После создания разметки документа HTML и добавления цвета фона для разборчивости проект выглядит следующим образом:


